How to Reskin an Android App in Android Studio (Step by Step)
Make any Android source code your own: your name, icon, colours, font, text and menu links, step by step with copy-paste Java and Kotlin code. No experience needed.
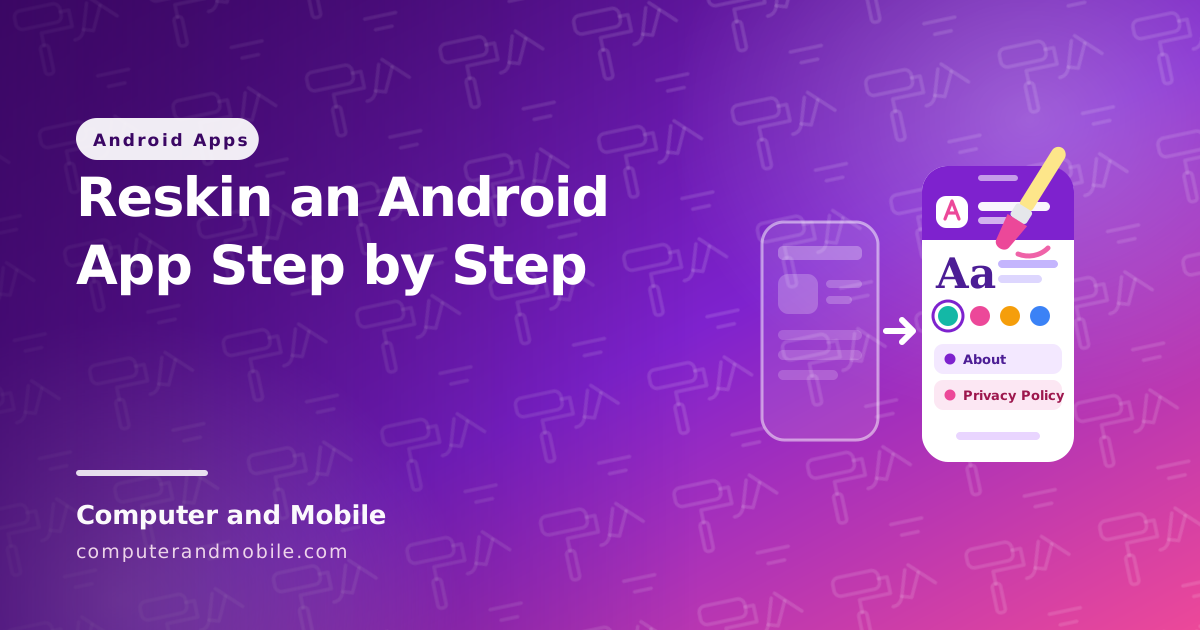
Reskinning means taking an app that already works and turning it into your own: a new name, a new icon, your colours and font, your text and your links. The code underneath stays the same. It is how most people start selling apps from purchased source code, and it is also how a lot of apps get rejected from Google Play, because the reskin stopped at the logo.
This guide walks through a full reskin in Android Studio, in the order that avoids broken builds. Every step has the exact file to open, and the code is in both Java and Kotlin. It also covers the part most guides skip: what Google Play checks before it accepts a reskinned app.
What a reskin changes, and what it does not
A reskin changes how the app looks and who it belongs to. It does not change what the app does.
| Change | Where it lives |
|---|---|
| Package name (the app’s unique ID) | app/build.gradle |
| App name | res/values/strings.xml |
| App icon | res/mipmap-* |
| Colours | res/values/colors.xml and themes.xml |
| Font | res/font/ and the theme |
| All visible text | res/values/strings.xml |
| Menu links (Privacy Policy, About) | res/menu/ and the activity |
| Splash screen | the theme and MainActivity |
| Ad and Firebase IDs | AndroidManifest.xml, google-services.json |
If you only change the logo and the name, Google sees the same app as the original and as every other copy of it. The steps at the end deal with that.
What you need
- Android Studio, the current stable version.
- The source code you have the right to rebrand. A purchased licence allows this; an app you downloaded from someone else does not.
- Your assets: a square logo at least 1024×1024 px with a transparent background, your brand colours as hex codes, and a font file in TTF or OTF.
- A website page for your privacy policy. Google Play requires one for almost every app.
Step 1: Open the project and get a clean build first
Do not change anything yet. Open the project with File → Open, let Gradle sync finish, and run the app once on a phone or emulator.
If it does not build now, it will not build after a reskin either, and you will not know which change broke it. The two usual problems:
- Gradle or JDK version errors. Accept the upgrade Android Studio offers, or set the JDK under Settings → Build Tools → Gradle → Gradle JDK to the bundled version.
- “No matching client found for package name”. The project uses Firebase and the old
google-services.jsondoes not match. Leave it for now; Step 10 replaces it.
Once it runs, commit the untouched project to Git or copy the folder. That is your way back.
Step 2: Change the package name
The package name, or applicationId, is the app’s permanent identity on Google Play. Two apps can never share one, so this is not optional: if you keep the original, Play will refuse the upload because that ID already belongs to someone.
Open app/build.gradle.kts (or app/build.gradle in older projects) and change both lines:
android {
    namespace = "com.yourbrand.chat"

    defaultConfig {
        applicationId = "com.yourbrand.chat"
        versionCode = 1
        versionName = "1.0"
    }
}
The Groovy version looks like this:
android {
    namespace 'com.yourbrand.chat'

    defaultConfig {
        applicationId "com.yourbrand.chat"
        versionCode 1
        versionName "1.0"
    }
}
applicationId is what Play sees. namespace is where your R and BuildConfig classes are generated. Keeping them the same avoids confusion.
To rename the Java or Kotlin folders as well, switch the Project panel to Android view, click the gear icon and untick Compact Middle Packages, then right-click each part of the old package and choose Refactor → Rename. This is cosmetic; the app works with the old folder names, but a clean project is easier to maintain. Run Build → Clean Project afterwards.
Step 3: Change the app name
Open res/values/strings.xml and change app_name:
<string name="app_name">BrandChat</string>Then check AndroidManifest.xml. The android:label on the <application> tag should point to @string/app_name. Some source codes hardcode the name there or on individual activities, so search the whole project with Ctrl+Shift+F for the old name.
Step 4: Change the app icon
Right-click the res folder and choose New → Image Asset. Image Asset Studio builds every icon size and the adaptive icon for you.
- Keep Icon type on Launcher Icons (Adaptive and Legacy).
- On the Foreground Layer tab, choose your logo and resize it until it sits inside the safe zone circle.
- On the Background Layer tab, pick a colour, usually your brand colour or white.
- Keep the name
ic_launcherso the manifest does not need to change, and click Finish.
Uninstall the old version from your phone before testing. Launchers cache icons, and an old icon after a reinstall is the launcher, not your build.
Google Play also needs a separate 512×512 px PNG icon for the store listing. Export that from the same logo.
Step 5: Change the colours
Colours are set in two places. colors.xml names them, and the theme decides where each one is used. Open res/values/colors.xml and add your brand colours:
<?xml version="1.0" encoding="utf-8"?>
<resources>
    <color name="brand_primary">#0D9488</color>
    <color name="brand_primary_dark">#0F766E</color>
    <color name="brand_accent">#F59E0B</color>
    <color name="brand_surface">#F8FAFC</color>
    <color name="white">#FFFFFF</color>
</resources>
Now open res/values/themes.xml. Projects built on Material 3 use the attributes below; change them to your colours:
<style name="Theme.BrandChat" parent="Theme.Material3.DayNight.NoActionBar">
    <item name="colorPrimary">@color/brand_primary</item>
    <item name="colorOnPrimary">@color/white</item>
    <item name="colorPrimaryContainer">@color/brand_primary_dark</item>
    <item name="colorSecondary">@color/brand_accent</item>
    <item name="android:colorBackground">@color/brand_surface</item>
</style>
Three things catch people out here:
- Dark mode has its own file. Check
res/values-night/themes.xmltoo, or the app keeps the old colours whenever the phone is in dark mode. - Hardcoded colours. Older source codes write
#FF5722straight into layouts. Search the project for#insideres/layoutand swap them for your@color/names. - The status bar. Apps that target Android 15 (API 35) or newer draw edge to edge, and
android:statusBarColorno longer has any effect. The colour behind the status bar comes from your toolbar or top app bar instead.
If the app is built with Jetpack Compose, the colours are in ui/theme/Color.kt and Theme.kt instead of XML:
private val BrandColors = lightColorScheme(
    primary = Color(0xFF0D9488),
    onPrimary = Color.White,
    secondary = Color(0xFFF59E0B),
    background = Color(0xFFF8FAFC)
)

@Composable
fun BrandChatTheme(content: @Composable () -> Unit) {
    MaterialTheme(colorScheme = BrandColors, typography = BrandTypography, content = content)
}
Step 6: Change the font of the whole app
Changing the font once in the theme is far better than editing every TextView. Right-click res and choose New → Android Resource Directory, set the type to font, and copy your font files into it.
File names in res may only use lowercase letters, numbers and underscores. Rename Poppins-Bold.ttf to poppins_bold.ttf before copying it in, or the build fails with an unhelpful error.
Then create res/font/poppins.xml, which groups the weights into one family:
<?xml version="1.0" encoding="utf-8"?>
<font-family xmlns:android="http://schemas.android.com/apk/res/android"
    xmlns:app="http://schemas.android.com/apk/res-auto">

    <font android:fontStyle="normal" android:fontWeight="400"
        android:font="@font/poppins_regular"
        app:fontStyle="normal" app:fontWeight="400"
        app:font="@font/poppins_regular" />

    <font android:fontStyle="normal" android:fontWeight="700"
        android:font="@font/poppins_bold"
        app:fontStyle="normal" app:fontWeight="700"
        app:font="@font/poppins_bold" />
</font-family>
Point the theme at the family. Both lines are needed: the first is read by the platform views, the second by AppCompat and Material components.
<style name="Theme.BrandChat" parent="Theme.Material3.DayNight.NoActionBar">
    <!-- colours from the step above -->
    <item name="android:fontFamily">@font/poppins</item>
    <item name="fontFamily">@font/poppins</item>
</style>
That covers almost every piece of text in the app. If a screen still shows the old font, that view or its style sets its own android:fontFamily or textAppearance; change it there.
For Compose, define the family once and copy it into the typography the theme uses:
val Poppins = FontFamily(
    Font(R.font.poppins_regular, FontWeight.Normal),
    Font(R.font.poppins_bold, FontWeight.Bold)
)

val BrandTypography = Typography().run {
    copy(
        bodyLarge = bodyLarge.copy(fontFamily = Poppins),
        bodyMedium = bodyMedium.copy(fontFamily = Poppins),
        titleLarge = titleLarge.copy(fontFamily = Poppins),
        labelLarge = labelLarge.copy(fontFamily = Poppins)
    )
}
Step 7: Change the text
Every word the user sees should be in res/values/strings.xml. Go through it line by line and rewrite it in your own words: welcome screens, button labels, empty states, error messages. This is also where your app starts to feel different from the original, which matters later for Google Play.
To find text that was typed straight into layouts, run Code → Inspect Code and look for the Hardcoded text warning. Move each one into strings.xml.
If you want the app in Urdu or another language as well, create res/values-ur/strings.xml with the same names and translated values. Android picks the right file from the phone’s language.
Step 8: Add Privacy Policy and About to the menu
This is where you add your own links. A privacy policy link inside the app is good practice and something Google Play reviewers look for, and an About screen tells users whose app this is.
First add the text and the link to strings.xml, so they can be changed later without touching code:
<string name="menu_home">Home</string>
<string name="menu_more">More</string>
<string name="menu_privacy">Privacy Policy</string>
<string name="menu_about">About</string>
<string name="privacy_url">https://yourwebsite.com/privacy/</string>
<string name="about_text">Version %1$s\nMade by Your Brand.</string>
If the app has a navigation drawer
Open the drawer’s menu file, usually res/menu/activity_main_drawer.xml or drawer_menu.xml, and add the two items. Putting them in a submenu gives them their own section under a divider:
<?xml version="1.0" encoding="utf-8"?>
<menu xmlns:android="http://schemas.android.com/apk/res/android">

    <group android:id="@+id/group_main" android:checkableBehavior="single">
        <item android:id="@+id/nav_home"
            android:icon="@drawable/ic_home"
            android:title="@string/menu_home" />
    </group>

    <item android:title="@string/menu_more">
        <menu>
            <item android:id="@+id/nav_privacy"
                android:icon="@drawable/ic_privacy"
                android:title="@string/menu_privacy" />
            <item android:id="@+id/nav_about"
                android:icon="@drawable/ic_info"
                android:title="@string/menu_about" />
        </menu>
    </item>
</menu>
Add the icons with New → Vector Asset, search the clip art for “privacy” and “info”, and name them to match.
The links open in a Custom Tab, which is Chrome inside your app with your colours, so the user never feels sent away. Add the dependency to app/build.gradle.kts:
implementation("androidx.browser:browser:1.8.0")Then handle the clicks in the activity that owns the drawer. Java:
navigationView.setNavigationItemSelectedListener(item -> {
    int id = item.getItemId();
    if (id == R.id.nav_privacy) {
        openUrl(getString(R.string.privacy_url));
    } else if (id == R.id.nav_about) {
        showAbout();
    }
    drawerLayout.closeDrawers();
    return true;
});

private void openUrl(String url) {
    new CustomTabsIntent.Builder().build().launchUrl(this, Uri.parse(url));
}

private void showAbout() {
    new MaterialAlertDialogBuilder(this)
        .setTitle(R.string.app_name)
        .setMessage(getString(R.string.about_text, BuildConfig.VERSION_NAME))
        .setPositiveButton(android.R.string.ok, null)
        .show();
}
Kotlin:
navigationView.setNavigationItemSelectedListener { item ->
    when (item.itemId) {
        R.id.nav_privacy -> openUrl(getString(R.string.privacy_url))
        R.id.nav_about -> showAbout()
    }
    drawerLayout.closeDrawers()
    true
}

private fun openUrl(url: String) {
    CustomTabsIntent.Builder().build().launchUrl(this, Uri.parse(url))
}

private fun showAbout() {
    MaterialAlertDialogBuilder(this)
        .setTitle(R.string.app_name)
        .setMessage(getString(R.string.about_text, BuildConfig.VERSION_NAME))
        .setPositiveButton(android.R.string.ok, null)
        .show()
}
The Java version uses if rather than switch on purpose. Since Android Gradle Plugin 8, resource IDs are no longer constants, and a switch on R.id values does not compile.
The About dialog shows the version with BuildConfig.VERSION_NAME. New projects do not generate BuildConfig by default, so if it shows in red, switch it on:
android {
    buildFeatures {
        buildConfig = true
    }
}
If the app has a toolbar with a three-dot menu
Create res/menu/main_menu.xml:
<?xml version="1.0" encoding="utf-8"?>
<menu xmlns:android="http://schemas.android.com/apk/res/android"
    xmlns:app="http://schemas.android.com/apk/res-auto">
    <item android:id="@+id/action_privacy"
        android:title="@string/menu_privacy"
        app:showAsAction="never" />
    <item android:id="@+id/action_about"
        android:title="@string/menu_about"
        app:showAsAction="never" />
</menu>
And in the activity (Kotlin; the Java version follows the same pattern with if):
override fun onCreateOptionsMenu(menu: Menu): Boolean {
    menuInflater.inflate(R.menu.main_menu, menu)
    return true
}

override fun onOptionsItemSelected(item: MenuItem): Boolean = when (item.itemId) {
    R.id.action_privacy -> { openUrl(getString(R.string.privacy_url)); true }
    R.id.action_about -> { showAbout(); true }
    else -> super.onOptionsItemSelected(item)
}
Step 9: Change the splash screen
Since Android 12 the system draws the splash screen itself, from your theme. Older source codes often still have a separate SplashActivity with a timer; that now shows two splash screens in a row. The clean way is the SplashScreen library:
implementation("androidx.core:core-splashscreen:1.0.1")Add a starting theme to themes.xml and set it on MainActivity in the manifest:
<style name="Theme.BrandChat.Starting" parent="Theme.SplashScreen">
    <item name="windowSplashScreenBackground">@color/brand_primary</item>
    <item name="windowSplashScreenAnimatedIcon">@drawable/ic_splash_logo</item>
    <item name="postSplashScreenTheme">@style/Theme.BrandChat</item>
</style>
Then install it at the top of onCreate:
override fun onCreate(savedInstanceState: Bundle?) {
    installSplashScreen()          // before super.onCreate
    super.onCreate(savedInstanceState)
    setContentView(R.layout.activity_main)
}
The icon should be a vector or a PNG with plenty of empty space around the logo, because the system crops it into a circle.
Step 10: Replace the ad and Firebase IDs
This step is easy to forget and expensive to get wrong. If you publish with the original developer’s AdMob IDs, the ad money goes to them.
- AdMob: create your own app in AdMob, then replace the App ID in
AndroidManifest.xmland every ad unit ID, which are usually instrings.xml. Use Google’s test IDs while you develop. Our AdMob integration guide covers this in detail. - Firebase: create a new Firebase project, add an Android app with your new package name, download its
google-services.jsonand replace the one in theapp/folder. The old file is tied to the old package name and the build will fail with it.
<meta-data
    android:name="com.google.android.gms.ads.APPLICATION_ID"
    android:value="ca-app-pub-xxxxxxxxxxxxxxxx~yyyyyyyyyy" />
Also search for API keys, server URLs and email addresses the original developer left in the code. If the app talks to a backend, such as the server in our chat app tutorial, point it at yours.
Step 11: Version, sign and build
Set versionCode to 1 and versionName to “1.0” for your first release. Every later update needs a higher versionCode, or Play rejects it.
Build the release with Build → Generate Signed App Bundle or APK → Android App Bundle, and create a new keystore. Do not reuse one that came with the source code. Back the keystore and its passwords up somewhere safe; with Play App Signing you can recover from losing it, but it is a slow process.
Step 12: Make sure Google Play accepts it
Google Play does not allow apps that offer the same experience as apps already in the store, apps built from templates without original content, or many near-identical apps from one developer. A reskin that only changes the logo fits that description exactly, and it is the most common reason reskinned apps are rejected or later removed.
What makes a reskin acceptable is real difference:
- Your own content. Different categories, data, images, wording or levels, not the demo content that came with the code.
- At least one feature or change in focus the original does not have, even a small one aimed at a specific audience.
- A unique store listing: your own description, screenshots of your version, and your own feature graphic. Never copy the original listing.
- A working privacy policy URL in the Play Console, the same one your menu links to, and an honest Data safety form.
- One good app, not ten copies. Publishing the same reskin under several names is exactly what the policy targets and can put the whole developer account at risk.
Reskin checklist
| Check | Done when |
|---|---|
| Clean build before changes | The untouched project runs |
| Package name | applicationId and namespace are yours |
| Name and icon | The launcher shows your name and icon after a fresh install |
| Colours | Light and dark mode both use your colours |
| Font | Every screen uses your font |
| Text | No hardcoded text warnings; all wording is yours |
| Menu | Privacy Policy opens your page; About shows your name and version |
| Splash | One splash screen, with your logo |
| IDs | Your AdMob IDs and your google-services.json |
| Release | Signed with your own new keystore |
| Store listing | Own description, screenshots and privacy policy |
Mistakes that cost the most time
- Reskinning before the first clean build. You cannot tell your mistakes from problems the code already had.
- Changing only
namespace. The app still has the oldapplicationIdand Play refuses it. - Font files with capital letters or dashes in
res/font. - Forgetting
values-night, so the old colours appear in dark mode. - Publishing with someone else’s ad IDs or keystore.
Where to get source code worth reskinning
A reskin is only as good as the code under it. Pick a project that builds on a current Android Gradle Plugin, targets a recent API level, and comes with documentation and support. You can browse ready-made, tested Android app source codes in our shop; each one is a clean starting point for exactly the steps above. If you would rather start from a website, see how to convert a website into an Android app.