How to Make a VPN App in Android Studio (WireGuard and OpenVPN)
Build a simple Android VPN app in Kotlin that imports a WireGuard config file from the phone and connects, in one page of code. Plus a one-phone test server, what an IP pool is, OpenVPN and its licence, and Google Play's VPN rules.
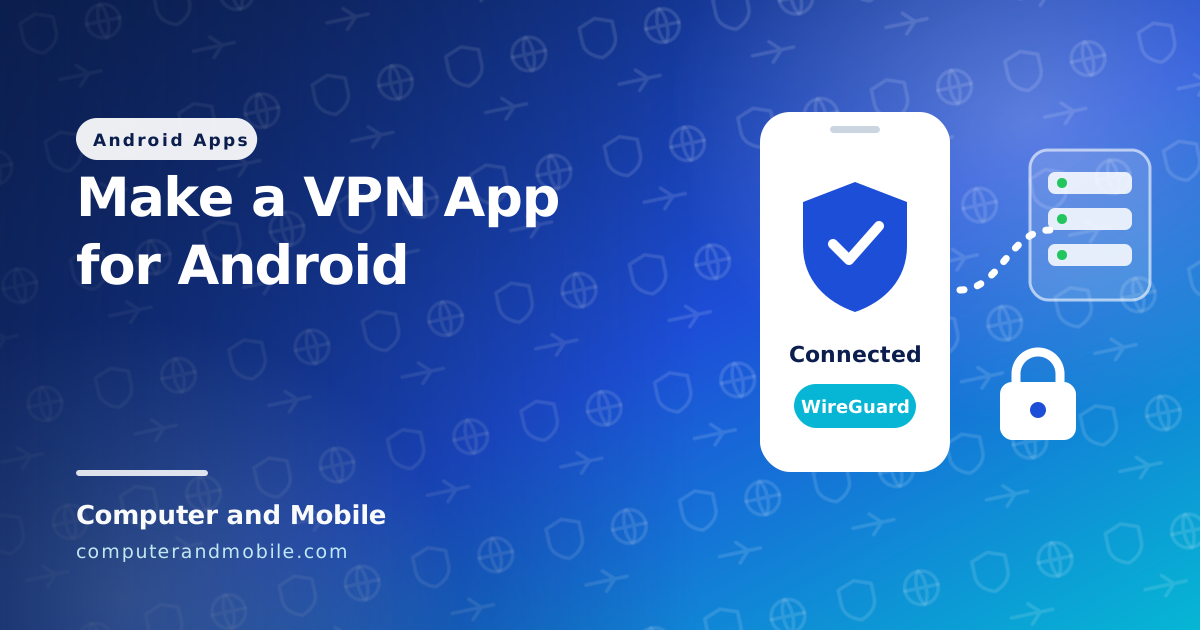
A VPN app on Android has three parts: the app, which asks Android for permission and opens a secure tunnel; a VPN library, which speaks the VPN protocol; and a server, which receives the traffic and sends it on to the internet. Most tutorials show only pieces of the first part, so the app installs, the key icon appears, and nothing loads.
This guide gives you a complete VPN app in one page of Kotlin: the user imports a WireGuard config file from the phone, taps Connect, and all the phone's traffic goes through the VPN. You will also set up a test server for one phone, so you have a config file to import. After that the guide explains what changes when you have hundreds of users, how OpenVPN fits in, and the Google Play rules every VPN app has to follow.
How a VPN app works
Android has a built-in class for this, VpnService. When your app starts a VPN, Android creates a virtual network card on the phone. The traffic of other apps goes into it, your VPN code encrypts it and sends it to your server, and the server decrypts it and forwards it to the website the user asked for.
| Part | What it does |
|---|---|
| The app | The buttons, the status, the permission request |
| The VPN library | WireGuard or OpenVPN: encryption and the tunnel itself |
| The VPN server | A VPS that receives the tunnel and forwards the traffic to the internet |
| The config file | Tells the app which server to use and the keys for this phone |
Two rules come from Android itself. The user must approve your app once in a system dialog before it can start a VPN, and only one VPN can run at a time: if the user starts another VPN app, yours is disconnected.
WireGuard or OpenVPN?
| WireGuard | OpenVPN | |
|---|---|---|
| Speed and battery | Faster, lighter | Slower, heavier |
| Android library | Official WireGuard tunnel library, Apache 2.0 licence | OpenVPN for Android (ics-openvpn), GPL v2 licence |
| Config | One short text file | A longer .ovpn file with certificates |
| Strict networks | UDP only, so some networks block it | Can run on TCP port 443, which looks like normal web traffic |
Start with WireGuard. It is easier, faster, and its Android library can be used in a closed-source app. This guide uses it.
What you need
- Android Studio, the newest stable version
- A real Android phone with Android 7.0 or newer. The WireGuard library needs API 24, and an emulator is a poor place to test a VPN.
- A WireGuard config file (
.conf) for that phone. If you do not have one, the next section makes one.
The config file
A WireGuard config is a short text file. This is what the app will import:
[Interface]
PrivateKey = THE_PHONE'S_PRIVATE_KEY
Address = 10.7.0.2/32
DNS = 1.1.1.1, 1.0.0.1
MTU = 1280

[Peer]
PublicKey = THE_SERVER'S_PUBLIC_KEY
AllowedIPs = 0.0.0.0/0
Endpoint = 203.0.113.20:51820
PersistentKeepalive = 25| Line | What it means |
|---|---|
PrivateKey | This phone's secret key. Every phone has its own. |
Address | This phone's address inside the tunnel. Every phone has its own here too. |
DNS | Without it, website names stop resolving once the tunnel is up |
MTU = 1280 | Mobile networks often drop large packets. A small MTU avoids the classic “connected but no internet” problem. |
PublicKey | The server's public key |
AllowedIPs = 0.0.0.0/0 | Send all of the phone's traffic through the VPN |
Endpoint | The server's IP address and port |
PersistentKeepalive = 25 | Keeps the connection open through home routers and mobile networks |
A test server for one phone
On a VPS with Ubuntu 22.04 or 24.04 (the smallest plan is fine for a test), install WireGuard and make two key pairs, one for the server and one for the phone. The examples use 203.0.113.20 as the server's IP: use yours.
sudo apt update
sudo apt install -y wireguard
cd /etc/wireguard
wg genkey | sudo tee server.key | wg pubkey | sudo tee server.pub
wg genkey | sudo tee phone.key  | wg pubkey | sudo tee phone.pub
sudo chmod 600 server.key phone.key
ip route get 1.1.1.1      # the word after "dev" is your network card, e.g. eth0
Create /etc/wireguard/wg0.conf with sudo nano /etc/wireguard/wg0.conf. Put in the text of the two key files, and change eth0 if your network card has another name:
[Interface]
Address = 10.7.0.1/24
ListenPort = 51820
PrivateKey = TEXT_OF_server.key
PostUp = iptables -t nat -A POSTROUTING -s 10.7.0.0/24 -o eth0 -j MASQUERADE; iptables -A FORWARD -i wg0 -j ACCEPT; iptables -A FORWARD -o wg0 -j ACCEPT
PostDown = iptables -t nat -D POSTROUTING -s 10.7.0.0/24 -o eth0 -j MASQUERADE; iptables -D FORWARD -i wg0 -j ACCEPT; iptables -D FORWARD -o wg0 -j ACCEPT

[Peer]
# the one test phone
PublicKey = TEXT_OF_phone.pub
AllowedIPs = 10.7.0.2/32
Let the server forward traffic, start WireGuard and open its port:
echo "net.ipv4.ip_forward=1" | sudo tee /etc/sysctl.d/99-wireguard.conf
sudo sysctl --system
sudo systemctl enable --now wg-quick@wg0
sudo ufw allow 51820/udp
sudo wg show
Many VPS providers also have a firewall in their control panel: open UDP 51820 there too. Now make the phone's file: copy the config from the previous section into a file called phone.conf, put the text of phone.key after PrivateKey, the text of server.pub after PublicKey, and your server's IP in Endpoint. Send the file to the phone, for example by email or WhatsApp, and save it in Downloads.
The app: one page of code
- In Android Studio choose New Project → Empty Activity, language Kotlin, minimum SDK API 24, and click Finish.
- Add the WireGuard library to
app/build.gradle.ktsand click Sync Now. Check Maven Central forcom.wireguard.android:tunneland use the newest version. - Add the internet permission to
AndroidManifest.xml. - Open
MainActivity.ktand replace everything in it with the code below.
dependencies {
    implementation("com.wireguard.android:tunnel:1.0.20260102")
}
<!-- app/src/main/AndroidManifest.xml, above <application> -->
<uses-permission android:name="android.permission.INTERNET" />You do not need to declare a VPN service yourself: the WireGuard library's own manifest adds one, with the BIND_VPN_SERVICE permission, and Android Studio merges it into your app.
package com.example.myvpn   // keep the package line Android Studio made for you

import android.app.Activity
import android.content.Context
import android.net.Uri
import android.net.VpnService
import android.os.Bundle
import android.view.Gravity
import android.widget.Button
import android.widget.LinearLayout
import android.widget.TextView
import android.widget.Toast
import androidx.activity.ComponentActivity
import androidx.activity.result.contract.ActivityResultContracts
import androidx.core.view.ViewCompat
import androidx.core.view.WindowInsetsCompat
import com.wireguard.android.backend.GoBackend
import com.wireguard.android.backend.Tunnel
import com.wireguard.config.Config
import kotlin.concurrent.thread

class MainActivity : ComponentActivity() {

    private val backend by lazy { GoBackend(applicationContext) }
    private val tunnel = AppTunnel()
    private lateinit var status: TextView
    private var config: Config? = null

    // 1. Pick the .conf file on the phone (Downloads, Drive, WhatsApp files ...)
    private val pickConfig = registerForActivityResult(ActivityResultContracts.OpenDocument()) { uri ->
        if (uri != null) importConfig(uri)
    }

    // 2. Android's own "Connection request" dialog, shown once
    private val vpnPermission = registerForActivityResult(ActivityResultContracts.StartActivityForResult()) { result ->
        if (result.resultCode == Activity.RESULT_OK) connect()
    }

    override fun onCreate(savedInstanceState: Bundle?) {
        super.onCreate(savedInstanceState)

        status = TextView(this).apply { textSize = 20f; gravity = Gravity.CENTER }
        val importButton = Button(this).apply { text = "Import config file" }
        val connectButton = Button(this).apply { text = "Connect" }
        val disconnectButton = Button(this).apply { text = "Disconnect" }

        val screen = LinearLayout(this).apply {
            orientation = LinearLayout.VERTICAL
            gravity = Gravity.CENTER
            addView(status)
            addView(importButton)
            addView(connectButton)
            addView(disconnectButton)
        }
        setContentView(screen)

        // Keep the buttons clear of the status bar and the navigation bar (Android 15 and newer)
        ViewCompat.setOnApplyWindowInsetsListener(screen) { view, insets ->
            val bars = insets.getInsets(WindowInsetsCompat.Type.systemBars())
            view.setPadding(48, bars.top + 48, 48, bars.bottom + 48)
            insets
        }

        importButton.setOnClickListener { pickConfig.launch(arrayOf("*/*")) }
        connectButton.setOnClickListener { askPermissionThenConnect() }
        disconnectButton.setOnClickListener { disconnect() }

        // The last imported file is kept, so the user imports it only once
        getPreferences(Context.MODE_PRIVATE).getString("config", null)?.let { text ->
            config = runCatching { Config.parse(text.byteInputStream()) }.getOrNull()
        }
        status.text = if (config == null) "Import a WireGuard .conf file" else "Ready to connect"
    }

    private fun importConfig(uri: Uri) {
        try {
            val text = contentResolver.openInputStream(uri)!!.bufferedReader().use { it.readText() }
            config = Config.parse(text.byteInputStream())   // fails if it is not a WireGuard config
            getPreferences(Context.MODE_PRIVATE).edit().putString("config", text).apply()
            status.text = "Config imported. Tap Connect."
        } catch (e: Exception) {
            Toast.makeText(this, "This is not a valid WireGuard config file", Toast.LENGTH_LONG).show()
        }
    }

    private fun askPermissionThenConnect() {
        if (config == null) {
            status.text = "Import a config file first"
            return
        }
        val intent = VpnService.prepare(this)   // null = the user already allowed it
        if (intent != null) vpnPermission.launch(intent) else connect()
    }

    private fun connect() {
        status.text = "Connecting ..."
        thread {   // setState waits for the tunnel, so it must not run on the main thread
            try {
                backend.setState(tunnel, Tunnel.State.UP, config)
            } catch (e: Exception) {
                runOnUiThread { status.text = "Could not connect: ${e.message}" }
            }
        }
    }

    private fun disconnect() {
        thread { runCatching { backend.setState(tunnel, Tunnel.State.DOWN, null) } }
    }

    // The library tells the tunnel when it goes up or down
    inner class AppTunnel : Tunnel {
        override fun getName() = "wg0"
        override fun onStateChange(newState: Tunnel.State) {
            runOnUiThread {
                status.text = if (newState == Tunnel.State.UP) "Connected" else "Disconnected"
            }
        }
    }
}| Part | What it does |
|---|---|
OpenDocument() | Opens the phone's file picker so the user can choose the .conf file |
Config.parse() | Reads the file. If it is not a WireGuard config, it fails and the app says so. |
getPreferences() | Keeps the imported config, so it is still there next time the app opens |
VpnService.prepare() | Returns Android's “Connection request” dialog the first time, and null once the user has allowed it |
GoBackend and setState | Start and stop the WireGuard tunnel. It waits, so it runs on a background thread. |
onStateChange | The library reports Connected or Disconnected, and the status text follows it |
Test it on the phone
- Run the app on the phone and tap Import config file. Choose
phone.conf. - Tap Connect and approve Android's dialog. The status changes to Connected and a key icon appears in the status bar.
- Open any “what is my IP” page in the browser. It should show your server's IP, not your own.
- On the server,
sudo wg shownow shows a latest handshake and data received and sent.
If there is no handshake, the phone never reached the server: check the IP, the port and the keys. If there is a handshake but pages do not open, see the common problems table below.
Many users: one config per phone and the IP pool
The config file belongs to one phone. A second phone cannot use the same file: two phones with the same keys and the same tunnel address knock each other offline. So every phone needs:
- its own key pair, and
- its own address inside the tunnel: 10.7.0.2 for the first phone, 10.7.0.3 for the next, and so on.
That range of addresses is the IP pool. With five friends you can make five config files by hand. With hundreds or thousands of users it has to be automatic, and that is a much bigger project than the app above:
- the app makes its own keys on first launch and sends only the public key to your server
- a registration service hands out a free address from the pool and adds the phone to WireGuard while it is running
- addresses of phones that uninstalled are given back to the pool
- several servers in different countries, a server list the app downloads, and protection so only your app can register
- reconnecting when the phone switches between Wi-Fi and mobile data, notifications, ads and analytics
Professional VPN apps work this way, and building and testing it properly takes weeks. If you want that part done, our VPN app source code includes it, described at the end of this guide.
Adding OpenVPN
OpenVPN on Android usually means OpenVPN for Android (the ics-openvpn project), added to your project as a module. It reads standard .ovpn files, can run over TCP 443, and works with VPN Gate, a free public list of volunteer servers run as a research project of the University of Tsukuba. Read VPN Gate's terms before you use it, and expect the speed to vary from server to server.
- The licence is GPL v2. If you publish an app that contains it, the GPL applies to your app: people who receive the app are entitled to its source code. Read the licence before you put it in a closed-source app.
- Keep the project in a short folder on Windows, for example
C:\Projects\VPN. The library has deep folders, and a path over 260 characters makes the build fail.
Google Play rules for VPN apps
Google Play has a specific policy for apps that use VpnService. Before you submit, make sure that:
- The VPN is the main purpose of the app. A game or a wallpaper app cannot quietly start a VPN.
- You fill in the VpnService declaration in Play Console when it asks for it.
- The traffic is encrypted from the phone to your server. WireGuard and OpenVPN both do this.
- The store listing says the app uses a VPN.
- No data collection without a clear disclosure and consent, and no redirecting or changing other apps' traffic to make money, for example injecting ads.
- The privacy policy describes what you log. “No logs” must be true on your server.
If your own service calls startForeground(), Android 14 and newer also require a foreground service type in the manifest. VPN apps outside the system usually declare specialUse with a short explanation.
Common problems
| Problem | Usual cause |
|---|---|
| “This is not a valid WireGuard config file” | The file has a typo, a missing [Interface] or [Peer] line, or a key that was cut short when copying |
| Connected, but no website opens | Forwarding is off (ip_forward), the wrong network card name in PostUp, or the MTU is too big. Use MTU = 1280. |
No handshake in wg show | UDP 51820 is closed in the provider's firewall, the endpoint IP is wrong, or the keys are swapped |
| “Could not connect” straight away | The user tapped Cancel on Android's dialog, or another VPN app is holding the VPN |
| Works on one phone, not on a second phone with the same file | Two phones cannot share one config: each needs its own keys and address (see the IP pool section) |
| Works on Wi-Fi, not on mobile data | Usually the MTU. Some networks also block UDP: offer OpenVPN on TCP 443 as a second option. |
| Websites by name do not load, IP addresses do | No DNS line in the config |
What it costs
| Item | Cost |
|---|---|
| A VPS per server location | From about $5 a month. Bandwidth, not CPU, decides how many users one server can carry. |
| Google Play developer account | $25, once |
| The one-page app above | An afternoon |
| A full app for many users (IP pool, registration, server list, reconnects, ads) | Weeks of building and testing |
The full version: our VPN app source codes
Our Android VPN app source code is the many-user version, finished: Kotlin and Jetpack Compose, WireGuard and OpenVPN in one server list, a key pair per phone, the registration script and the IP pool for your WireGuard server, the server list loaded from your own website, free VPN Gate servers with an update script (if an OpenVPN server does not connect, the app tries the next one), a speed test, AdMob and Firebase. You set your domain and keys, reskin it, and publish.
If you want SSTP instead, the secure VPN proxy app connects over SSTP to servers listed in a JSON file on your website, with a speed test, a quick-settings tile and kill-switch guidance.
Where to go next
- Reskin an Android app before you publish it under your own name
- Add AdMob ads without breaking Google Play's rules
- Set up a LAMP server on Ubuntu for a server list or a registration script